
To fix a leaking bathroom faucet, first identify where the water is coming from, shut off the hot and cold water supplies, and inspect the faucet’s cartridge, washers, O-rings, or valve seats. Replacing a worn internal component often stops the leak without replacing the entire faucet. However, corroded connections, damaged shutoff valves, and aging supply pipes in older homes may require professional plumbing repairs.
Introduction
A dripping bathroom faucet may seem like a minor problem, but a leak that continues day and night can waste water, stain the sink, and eventually damage the cabinet or surrounding materials. In older American homes, faucet repairs can also become more complicated because the plumbing connections may be decades old.
A bathroom in a 1930s or 1940s house may still have older metal supply pipes, original plumbing fixtures, or several generations of repairs. In a typical 1950s home, galvanized steel supply lines may have developed internal corrosion, while the shutoff valves beneath the sink may be difficult to operate. Even bathrooms remodeled in the 1970s or 1980s can contain aging faucet cartridges, deteriorated rubber seals, and corroded fittings.
Many homeowners assume that a leaking faucet always needs to be replaced. That is not necessarily true. A worn cartridge, damaged washer, loose retaining nut, or deteriorated O-ring may be responsible for the leak. In other situations, the faucet body itself may be corroded or the leak may actually originate from a supply connection underneath the sink.
The first step is to identify the source rather than immediately buying replacement parts. This guide explains how different faucet designs work, how to diagnose common leaks, which repairs homeowners can safely perform, and when replacing the faucet or calling a plumber makes more sense.
Table of Contents
- 1. Identify Where the Bathroom Faucet Is Leaking
- 2. Understand the Type of Faucet in Your Older Home
- 3. Tools and Replacement Parts You May Need
- 4. How to Fix a Leaking Bathroom Faucet Step by Step
- 5. Special Plumbing Problems in Older American Homes
- 6. Repair vs. Replace: Which Option Makes More Sense?
- 7. Bathroom Faucet Repair and Replacement Costs
- 8. Common Homeowner Situations
- 9. How to Prevent Bathroom Faucet Leaks
- Related Reading
- Frequently Asked Questions
- Final Thoughts
1. Identify Where the Bathroom Faucet Is Leaking
Before disassembling a faucet, determine exactly where the water is escaping. Different leak locations usually point to different failed components. Replacing the wrong part wastes time and may leave the original problem unresolved.
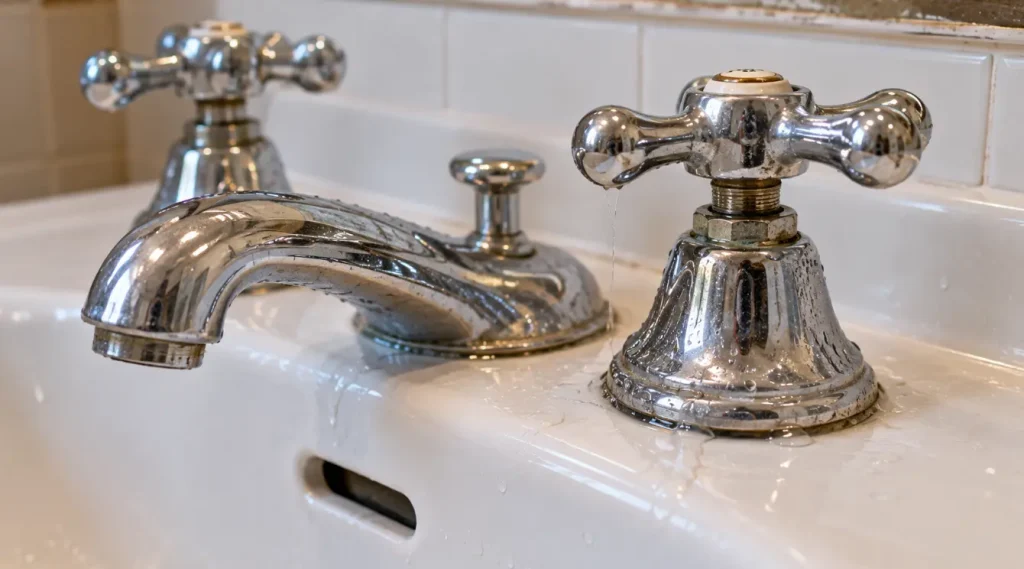
Water dripping from the faucet spout
If water continues dripping from the spout after the handles are fully closed, the internal sealing components may no longer be shutting off the water completely.
Common causes include:
- Worn rubber washers in compression faucets.
- A damaged or worn cartridge in cartridge faucets.
- Damaged valve seats or O-rings.
- Mineral deposits preventing internal components from sealing correctly.
- Damaged ceramic discs or internal seals in ceramic disc faucets.
A slow, consistent drip usually suggests an internal sealing problem. However, water pressure and debris can also affect how a faucet closes.
Water leaking around the handle
Water appearing around a faucet handle when the faucet is turned on may indicate a damaged stem O-ring, cartridge seal, packing, or retaining assembly. On older compression faucets, the packing material around the valve stem can deteriorate over time.
Check whether the leak occurs only when the water is running or continues after the faucet is shut off. This distinction can help narrow down the source.
Water leaking around the faucet base
Water around the base of a bathroom faucet does not automatically mean the internal cartridge has failed. Water may be escaping from the faucet body, mounting gasket, supply connections, or the sink deck itself.
Dry the surrounding surface and observe where moisture first appears. If water develops around the base only while the faucet is running, the faucet’s internal seals or body connections may need inspection. If water appears underneath the sink, inspect the supply lines and mounting connections.
Water leaking underneath the sink
A leak underneath the sink may come from a loose supply-line connection, deteriorated flexible hose, failing shutoff valve, or faucet mounting assembly.
Place a dry paper towel around individual connections and check which area becomes wet first. This can help identify the source without immediately removing the faucet.
Important: Water from a sink drain or drain connection can also collect beneath the cabinet. Do not assume every leak underneath a bathroom sink originates from the faucet supply system.
2. Understand the Type of Faucet in Your Older Home
Not every bathroom faucet uses the same internal mechanism. Before purchasing replacement parts, identify the faucet design and manufacturer. A washer designed for a compression faucet will not repair a cartridge faucet.
Compression faucets
Compression faucets are common in older plumbing installations and often have separate hot and cold handles. Turning a handle compresses a rubber washer against a valve seat to stop the water flow.
Over time, the washer can become hard, cracked, or worn. The valve seat may also develop corrosion or surface damage. A dripping compression faucet can often be repaired by replacing the washer and inspecting the valve seat.
Cartridge faucets
Cartridge faucets use an internal cartridge to control water flow and, in many models, temperature. They may have one handle or two separate handles.
When the cartridge or its seals wear out, water may drip from the spout or leak around the handle. Replacement cartridges must match the faucet manufacturer and model. Similar-looking cartridges are not necessarily interchangeable.
Ball faucets
Ball faucets typically have one handle that moves over a rounded internal ball assembly. They use a combination of seats, springs, seals, and other internal components to control water flow and temperature.
Worn seats and springs can cause dripping, while deteriorated seals may allow water to escape around the handle. Many ball faucets can be repaired with a model-specific repair kit.
Ceramic disc faucets
Ceramic disc faucets use two closely fitted ceramic discs to regulate water flow. They are generally designed for long service, but mineral deposits, damaged seals, or worn internal components can still cause leaks.
Before replacing the complete faucet, check whether the manufacturer offers replacement cartridges or service parts.
| Faucet Type | Common Leak Cause | Typical Repair | Repair Difficulty |
|---|---|---|---|
| Compression | Worn washer or damaged valve seat | Replace washer and inspect seat | Low to moderate |
| Cartridge | Worn cartridge or O-rings | Replace the matching cartridge or seals | Low to moderate |
| Ball | Worn seats, springs, or seals | Install a compatible repair kit | Moderate |
| Ceramic disc | Damaged seals or contaminated discs | Clean or replace serviceable components | Moderate |
Professional tip: If the faucet has no visible brand name, take clear photographs of the handles, spout, and internal cartridge before purchasing parts. Manufacturer identification and component dimensions are more reliable than choosing a replacement based on appearance alone.
3. Tools and Replacement Parts You May Need
For a straightforward faucet repair, homeowners may only need a few basic tools. However, the exact tools depend on the faucet design and the condition of the plumbing connections.
Basic tools
- Adjustable wrench or appropriately sized open-end wrench.
- Phillips and flathead screwdrivers.
- Allen keys for models with hidden handle screws.
- Needle-nose pliers.
- Replacement washers, O-rings, or faucet cartridges.
- Small flashlight and clean cloths.
- Bucket or shallow container to catch residual water.
Some faucets require a specialized cartridge puller or manufacturer-specific service tool. Avoid gripping polished faucet surfaces directly with metal pliers because they can scratch the finish.
Check the shutoff valves before beginning
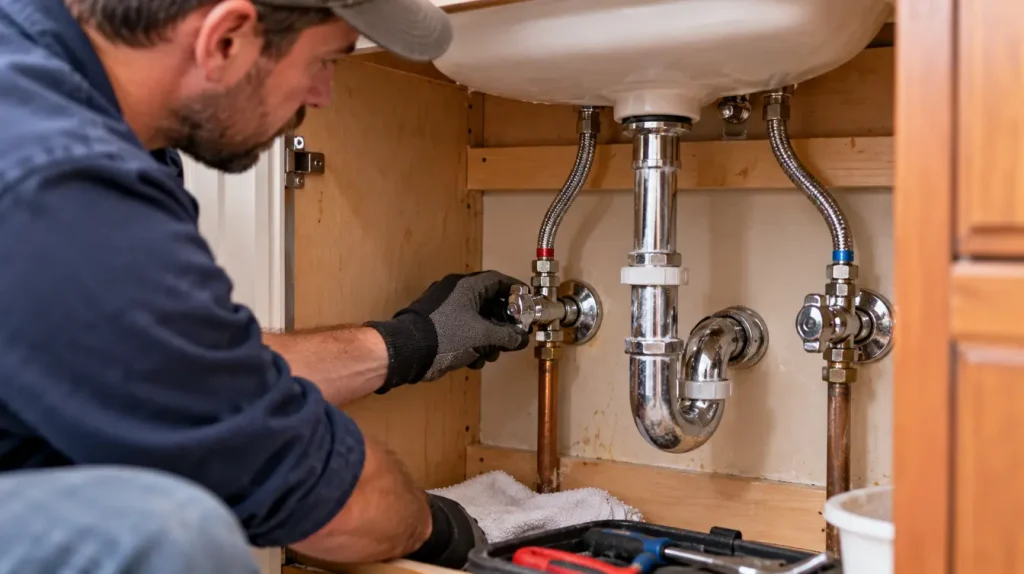
Most bathroom sinks have separate hot and cold shutoff valves underneath the sink. These valves allow the water supply to be isolated without shutting down the entire house.
However, old shutoff valves may be corroded, seized, or difficult to operate. In a 1940s or 1950s home, the valve may not have been turned for many years.
Turn the valve gently if it operates normally. Do not force a stuck valve with a wrench or extension handle. Excessive force can damage the valve stem or connection and create a larger leak.
If a shutoff valve does not work properly, stop the repair and have the water supply isolated using an appropriate method. A plumber may need to replace the valve before the faucet can be serviced safely.
4. How to Fix a Leaking Bathroom Faucet Step by Step
Once the leak location and faucet type have been identified, a homeowner may be able to replace a worn washer, cartridge, or seal without replacing the entire fixture. The following process applies to many common residential faucets, but the manufacturer’s instructions should always take priority because internal designs vary.
Step 1: Shut off the water supply
Close the hot and cold shutoff valves beneath the sink if they operate normally. Turn the faucet on to release remaining pressure and confirm that the water supply has stopped.
If water continues flowing, the shutoff valves may not be sealing completely. Do not proceed with disassembly until the supply has been properly isolated.
Place a bucket or towel underneath the sink to catch residual water. Cover the drain opening with a cloth so small screws or internal components cannot fall into it.
Step 2: Remove the faucet handle
Many faucets have a decorative cap that hides the handle screw. Carefully remove the cap using an appropriate tool, then loosen the screw with a screwdriver or Allen key.
Lift the handle straight off when possible. If it is stuck because of mineral buildup or corrosion, avoid excessive force. A suitable faucet handle puller may be necessary.
On older faucets, the handle itself may be brittle, corroded, or difficult to remove without damage. If the handle begins deforming, stop and consider professional assistance.
Step 3: Inspect the internal components
After removing the handle, identify the internal valve mechanism. Depending on the design, you may see a valve stem, retaining nut, cartridge, ball assembly, or ceramic disc cartridge.
Look for visible cracks, damaged rubber seals, mineral buildup, corrosion, or worn surfaces. Take photographs before removing parts so their orientation can be restored correctly.
Step 4: Remove the worn washer, cartridge, or seal
For a compression faucet, remove the appropriate valve stem and inspect the rubber washer at the bottom. A washer that is flattened, hardened, cracked, or missing material should generally be replaced.
For a cartridge faucet, follow the manufacturer’s instructions for removing the retaining clip or nut before pulling out the cartridge. Do not twist or pull components in a way that could damage the faucet body.
Ball faucets may require removal of a cap and cam assembly before the internal ball, seats, and springs can be accessed. Ceramic disc faucets may require removal of the cartridge housing to inspect the seals.
Step 5: Clean the valve body and inspect the valve seat
Remove loose mineral deposits and debris using a soft cloth and a cleaning method compatible with the faucet materials. Avoid aggressive scraping that could damage sealing surfaces.
On compression faucets, inspect the valve seat where the washer makes contact. If it is heavily corroded, deeply scratched, or uneven, replacing the washer alone may not stop the leak.
For cartridge faucets, inspect the cartridge housing and internal sealing surfaces. Debris inside the valve body can prevent a new cartridge from seating correctly.
Step 6: Install compatible replacement parts
Use the exact replacement cartridge or a compatible repair kit recommended for the faucet model. Apply plumber’s grease only where the manufacturer specifies it, and use a product suitable for potable-water plumbing components.
Do not substitute ordinary petroleum jelly or household lubricants for approved faucet grease. Some products can damage rubber seals or other internal materials.
Reinstall the components in their correct orientation. Replace damaged retaining clips or fasteners when required rather than reusing parts that no longer hold the assembly securely.
Step 7: Reassemble and test the faucet
Reinstall the handle and tighten the fasteners according to the manufacturer’s instructions. Open the shutoff valves slowly and check for leaks around the handle, faucet body, supply connections, and underneath the sink.
Operate both hot and cold water, check the temperature control, and observe the faucet after closing it. A few remaining drops immediately after use may be residual water in the spout, but continuous dripping indicates that the problem may not be resolved.
Recheck the connections after several minutes and again after normal use. If the leak continues, do not keep tightening parts in an attempt to force a seal. Reassess the component compatibility and the condition of the valve body.
Important safety advice: If the faucet is connected to brittle old piping, a corroded valve, or a fitting that begins moving inside the wall, stop. Further tightening or disassembly may turn a small faucet leak into a supply-line failure.
5. Special Plumbing Problems in Older American Homes
Fixing a leaking faucet in an older home is not always as simple as replacing a cartridge. The condition of the surrounding plumbing can determine whether the repair is safe, practical, and likely to last.
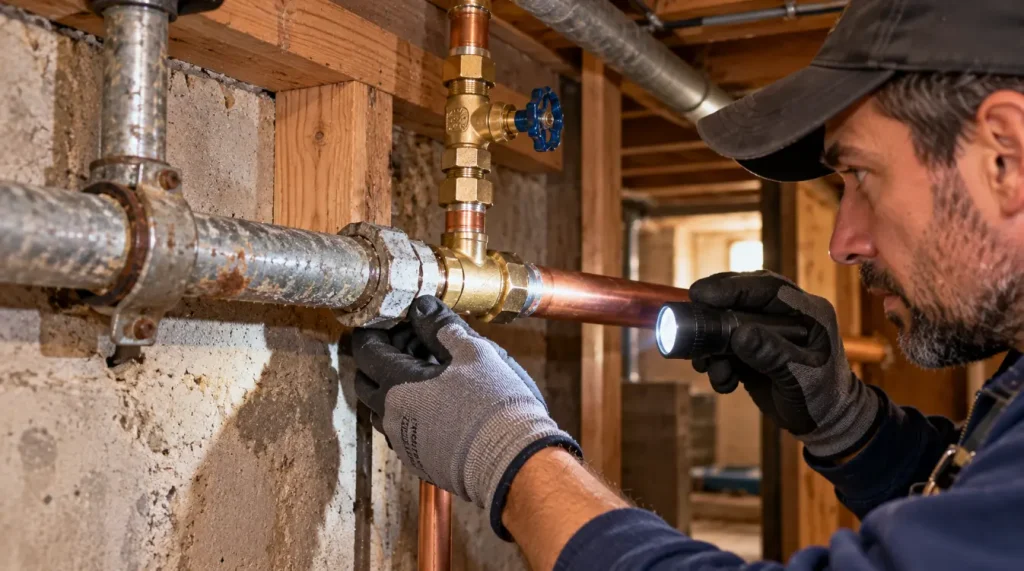
Galvanized steel supply pipes
Some older American houses still have galvanized steel water supply lines. These pipes can corrode internally as their protective coating deteriorates. Rust and mineral deposits may gradually restrict the pipe’s interior diameter, reducing water flow.
Homeowners may notice:
- Reduced water pressure at bathroom faucets.
- Rust-colored water, especially after water has been unused.
- Recurring debris in faucet aerators.
- Different flow rates between fixtures.
- Leaks around older threaded pipe connections.
A leaking faucet should not automatically be blamed on galvanized pipes. A worn cartridge can cause dripping even when the supply lines are functioning normally. However, if reduced flow and recurring sediment are also present, the plumber should evaluate the wider supply system.
Replacing one faucet will not solve widespread internal corrosion in the plumbing system. Depending on the condition of the pipes, localized repairs or a broader repiping project may be more appropriate.
Old brass, copper, and threaded connections
Older homes may contain a mixture of copper, brass, galvanized steel, and replacement fittings installed during previous repairs. Different materials require compatible connections and appropriate installation methods.
Corrosion can develop at threaded joints, particularly where connections have been exposed to moisture or incompatible materials. A connection that looks slightly discolored may still be functional, while a joint showing active leakage or severe deterioration needs further evaluation.
Do not assume that adding more thread sealant or tightening an old fitting will solve every leak. The fitting itself may be damaged and require replacement.
Lead-related concerns in older plumbing
Homes built before modern plumbing standards may have lead-containing components in certain parts of the water service system or plumbing connections. The presence of an old metal faucet does not establish whether the household water contains lead.
If the home has an older service line, unknown plumbing materials, or a history of lead-related concerns, consider an appropriate water test and consult the local water utility or a qualified plumbing professional. Faucet aerator cleaning does not remove lead that may be present in the water supply.
Basement and crawl space considerations
In homes with unfinished basements or crawl spaces, accessible plumbing may make it easier to inspect supply lines running toward the bathroom. However, moisture in these areas can accelerate corrosion and damage pipe supports or nearby building materials.
If a bathroom faucet leak is accompanied by dampness beneath the floor, inspect the accessible area for dripping connections, water stains, and deteriorated materials. A recurring moisture problem should be addressed at its source rather than covered with new finishes.
6. Repair vs. Replace: Which Option Makes More Sense?
Replacing the entire faucet is not always necessary. If the faucet body is in good condition and replacement parts are available, repairing the internal mechanism can be a cost-effective option.
When repairing the faucet makes sense
- The leak comes from a worn washer, cartridge, or O-ring.
- The faucet body has no significant cracks or corrosion.
- Compatible replacement parts are available.
- The handles and spout remain mechanically sound.
- The existing faucet is difficult to match with the sink or countertop.
A localized repair may also be preferable when the faucet is part of an older bathroom design and the homeowner wants to preserve its original appearance.
When replacing the faucet is better
- The faucet body is cracked or severely corroded.
- Replacement cartridges or internal parts are unavailable.
- Several internal components have deteriorated.
- The faucet has repeated leaks despite correct repairs.
- The fixture is incompatible with the planned sink or plumbing changes.
Replacement may also be sensible when an inexpensive modern faucet is easier to maintain than an obsolete fixture with difficult-to-find parts. However, check the sink’s mounting-hole arrangement, faucet spacing, supply connections, and drain configuration before purchasing a new unit.
Repair or replace comparison
| Decision Factor | Repair Existing Faucet | Replace Faucet |
|---|---|---|
| Initial cost | Usually lower when parts are available | Usually higher due to fixture and installation costs |
| Labor | Disassembly and internal component replacement | Removal, mounting, connection, and testing |
| Appearance | Preserves the existing fixture | Provides an opportunity to update the bathroom |
| Long-term maintenance | Depends on remaining component condition and parts availability | Depends on product quality and replacement-part support |
| Best situation | Localized wear with a sound faucet body | Severe corrosion, repeated failures, or unavailable parts |
Professional recommendation: Compare the complete repair cost with the cost of a suitable replacement, including labor and any necessary valve or supply-line upgrades. Do not replace an entire faucet simply because one inexpensive internal component has worn out.
7. Bathroom Faucet Repair and Replacement Costs
Faucet repair costs depend on the faucet design, replacement-part availability, the condition of the shutoff valves, and local plumbing labor rates. A straightforward cartridge replacement is very different from removing a severely corroded faucet connected to aging metal pipes.
| Repair or Service | Illustrative U.S. Cost Range | Typical Situation |
|---|---|---|
| Replacement washers and O-rings | $5–$30 for common parts | Basic compression faucet or seal repair |
| Replacement cartridge | $15–$100+ | Cartridge faucet with an available matching part |
| Faucet repair kit | $10–$60+ | Ball faucet or model-specific internal repair |
| Professional faucet repair | $150–$350+ | Typical service visit with relatively straightforward work |
| Bathroom faucet replacement | $200–$600+ | Basic fixture replacement with accessible plumbing |
| Shutoff valve replacement | $150–$400+ per valve | Corroded or nonfunctional sink supply valve |
These are broad illustrative planning ranges, not verified national averages or guaranteed 2026 local quotes. Costs vary with labor rates, emergency service charges, fixture quality, access, and whether additional plumbing repairs are required. Some estimates may include materials and labor, while others list them separately.
Why older homes may cost more to repair
A plumber may need additional time to remove corroded fittings, replace seized shutoff valves, adapt old connections, or identify an obsolete faucet model. If the supply pipe is damaged, the repair may extend beyond the sink cabinet.
Before approving the work, request an itemized estimate showing the faucet repair, valve replacement, supply-line work, and any additional plumbing modifications separately. This makes it easier to understand which expenses are essential.
8. Common Homeowner Situations
Scenario 1: A homeowner in a 1940s house has a faucet that drips all night
If the faucet body looks sound and the leak comes directly from the spout, begin by identifying whether the fixture is a compression or cartridge design. A worn washer or cartridge may be responsible. Before disassembly, check whether the under-sink shutoff valves operate normally. If they are seized or heavily corroded, have a plumber address the water isolation problem first.
Scenario 2: A 1950s house has low water flow and a leaking bathroom faucet
Low flow combined with dripping deserves a broader inspection. The faucet may have a worn cartridge, but galvanized supply lines could also contain internal rust and mineral buildup. Clean or inspect the aerator and compare the flow at other fixtures. If several faucets have similar symptoms, investigate the supply system rather than replacing only the bathroom faucet.
Scenario 3: Water appears underneath the bathroom sink
If the leak occurs beneath the cabinet, dry the area and inspect the hot and cold supply connections, shutoff valves, faucet mounting points, and drain assembly. Use a dry paper towel to identify where moisture first appears. If water is coming from a corroded valve or pipe connection, stop using the fixture and arrange an appropriate repair. Replacing the faucet cartridge will not fix a leaking supply connection.
Scenario 4: A homeowner wants to preserve an original bathroom faucet
Older faucets may have distinctive handles, finishes, or dimensions that are difficult to reproduce with modern fixtures. If the faucet body remains sound, identifying the original manufacturer and finding compatible replacement parts may preserve the existing design. However, if the fixture has extensive internal corrosion, damaged threads, or unavailable components, replacement may be more practical.
Which option is best for different homeowners?
- Best for budget-conscious homeowners: Replace a worn washer, O-ring, or cartridge when the faucet body and surrounding connections remain in good condition.
- Best for long-term homeowners: Repair the faucet while also addressing deteriorated shutoff valves or supply connections that could cause future problems.
- Best before selling: Fix active leaks, confirm the faucet operates properly, and keep records of any plumbing work. Replace severely deteriorated fixtures rather than hiding defects.
- Best for rental properties: Use readily available replacement parts and durable fixtures with accessible shutoff valves. Standardized faucets can simplify future maintenance.
9. How to Prevent Bathroom Faucet Leaks
Regular maintenance can reduce the likelihood of recurring faucet leaks, especially in homes with older plumbing. The goal is to identify worn components and deteriorating connections before they cause water damage.
Clean the faucet aerator regularly
The aerator is the small screen assembly at the end of the faucet spout. It collects sediment, mineral deposits, and debris that can reduce water flow or create an uneven stream.
Unscrew the aerator when appropriate, rinse away loose debris, and inspect the screen for corrosion or damage. If the faucet repeatedly collects rust-colored particles, investigate the water supply rather than assuming the aerator is the only problem.
Check faucet handles and connections
Inspect the handles for unusual looseness, water around the stem, or difficulty controlling the flow. Check the visible supply lines and shutoff valves underneath the sink for corrosion, moisture, or mineral deposits.
Do not overtighten handles or plumbing fittings. Excessive force can damage internal components and threaded connections.
Use replacement parts designed for the faucet
Keep the faucet manufacturer’s model information and replacement-part details when possible. Using compatible cartridges, washers, and seals reduces the chance of incorrect installation and recurring leaks.
Pay attention to water quality and pressure
Hard water can leave mineral deposits on internal faucet components, while sediment from aging pipes can interfere with sealing surfaces. If several fixtures develop similar problems, consider evaluating the household water supply and pressure.
Water pressure that is consistently above the commonly recommended residential range of approximately 40–80 psi should be investigated. A plumber can measure static and operating pressure and determine whether a pressure-reducing valve or other correction is appropriate.
Protect plumbing during cold weather
In colder parts of the United States, exposed pipes in basements, crawl spaces, and exterior walls may be vulnerable to freezing. Frozen or damaged supply lines can cause leaks that are unrelated to the faucet’s internal mechanism.
Insulate vulnerable pipes, maintain appropriate indoor temperatures during winter, and address drafts around plumbing penetrations. In areas with recurring freeze conditions, consider having exposed plumbing inspected before winter begins.
Related Reading
A leaking bathroom faucet can sometimes be an isolated fixture problem, but recurring leaks, low water flow, and rust-colored water may indicate broader plumbing issues. The following topics are useful for homeowners investigating older bathroom plumbing.
- How to identify warning signs of aging galvanized water supply pipes in older homes.
- How to find and fix hidden water leaks behind bathroom walls and beneath floors.
- Common bathroom remodeling mistakes involving plumbing connections and water damage.
- How to recognize water damage and moisture problems in older American homes.
Frequently Asked Questions
How much does it cost to fix a leaking bathroom faucet?
A simple DIY faucet repair may cost approximately $5–$100 for replacement washers, O-rings, cartridges, or repair kits. Hiring a plumber for a straightforward repair may cost around $150–$350 or more, depending on labor rates and the faucet design. Older homes can cost more when shutoff valves are seized, supply connections are corroded, or replacement parts are difficult to find. Before approving a replacement faucet, ask whether the leak can be corrected by replacing an internal component. An itemized estimate can help distinguish the cost of repairing the faucet from additional plumbing work.
Can I fix a leaking bathroom faucet without replacing the entire faucet?
Yes. Many leaking faucets can be repaired by replacing a worn washer, O-ring, cartridge, valve seat, or other internal sealing component. The correct repair depends on the faucet mechanism and the condition of the faucet body. Compression faucets commonly need washer or valve-seat attention, while cartridge faucets usually require a compatible replacement cartridge. Before disassembly, shut off the hot and cold water supplies and verify that the valves actually stop the flow. If the faucet body is cracked, severely corroded, or no longer supported by available replacement parts, replacing the complete fixture may be more practical.
Why does my bathroom faucet keep dripping after replacing the cartridge?
A faucet may continue dripping after a cartridge replacement because the replacement part is incorrect, installed in the wrong orientation, or not fully seated. Mineral deposits, damaged valve-body surfaces, worn secondary seals, and debris can also prevent a proper seal. First, verify the cartridge model and installation instructions. If the cartridge is correct, inspect the valve housing and surrounding sealing surfaces for damage. Do not repeatedly tighten the retaining nut to force the leak to stop. If the valve body is corroded or damaged, a plumber may need to assess whether the fixture can be repaired or should be replaced.
How long does a bathroom faucet usually last?
A reasonably maintained residential faucet may provide approximately 10–20 years or more of service, although actual lifespan varies with product quality, water chemistry, usage, and maintenance. Internal cartridges, washers, and O-rings may require replacement well before the complete faucet reaches the end of its useful life. Hard water, sediment, and excessive water pressure can accelerate wear. In an older home, the faucet may still function properly even when the surrounding supply connections are aging. Evaluate the condition of the fixture and plumbing separately rather than replacing everything based only on the home’s construction date.
Final Thoughts
A leaking bathroom faucet in an older house does not automatically require a complete fixture replacement. In many cases, a worn washer, cartridge, O-ring, or valve seat is responsible, and replacing the affected component can restore normal operation at a relatively low cost.
However, older American homes require additional attention to shutoff valves, galvanized supply pipes, corroded fittings, and previous plumbing repairs. A small faucet leak can become a larger problem if an aging connection is damaged during disassembly.
Before starting a repair, identify the leak location, determine the faucet type, and confirm that the water supply can be safely isolated. If the plumbing connections are severely corroded or the shutoff valves do not operate properly, consult a qualified plumber rather than forcing the components apart.
When deciding between repair and replacement, compare the condition of the faucet body, availability of replacement parts, and cost of the complete repair. Fixing the actual cause is usually more valuable than repeatedly replacing parts without understanding why the faucet continues leaking.
