
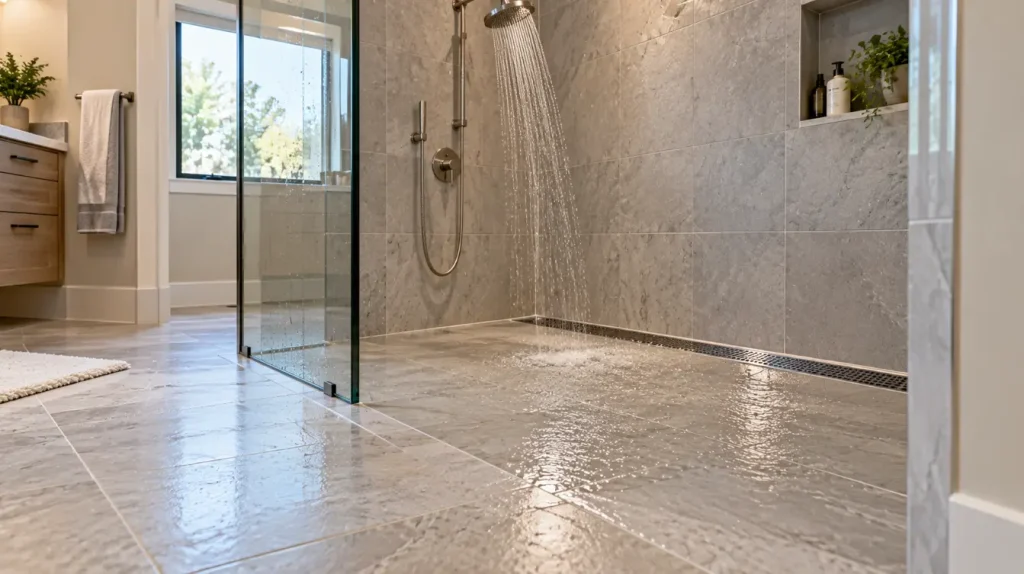
Water escapes from a curbless shower when the floor slope, drain placement, waterproofing, or splash protection is not properly designed or installed. Unlike a traditional shower with a raised threshold, a curbless shower has no physical barrier to contain water. Homeowners can prevent most problems by checking the floor pitch, drain capacity, glass panel placement, and waterproofing before construction is complete.
Introduction
Curbless showers have become popular in American bathroom remodeling because they create a clean, open appearance and make shower entry easier. With no raised curb to step over, they can also improve accessibility for older adults, people with mobility limitations, and homeowners planning to stay in their houses for many years.
However, removing the shower curb changes how the bathroom manages water. A traditional shower uses a raised barrier to help contain water, while a curbless design relies on carefully coordinated floor slope, drain placement, waterproofing, and shower enclosure design.
This can create challenges in older American homes. A 1930s or 1940s house may have wood-framed floors that are difficult to recess without affecting structural components. A 1950s home may have a concrete slab that requires more complicated drain modifications. Bathrooms in 1970s and 1980s houses may have previous remodeling work that does not provide a suitable base for a new curbless shower.
Homeowners often assume that water escaping the shower means the drain is defective. In reality, the cause may be an incorrect floor pitch, a poorly positioned drain, excessive shower spray, an unsuitable glass panel, or a waterproofing problem beneath the tile.
Understanding the difference between surface water escaping and water penetrating the bathroom floor is essential. One may require a relatively simple adjustment, while the other may require opening the floor and rebuilding part of the shower assembly.
Table of Contents
- How a Curbless Shower Controls Water
- Common Curbless Shower Problems at a Glance
- 1. Incorrect Shower Floor Slope
- 2. Poor Drain Placement or Insufficient Drainage Capacity
- 3. Water Splashing Outside the Shower Area
- 4. Inadequate Waterproofing
- 5. Floor Height and Structural Problems in Older Homes
- How to Identify Why Water Is Escaping
- Curbless Shower Repair Costs
- Common Homeowner Situations
- How to Prevent Curbless Shower Problems
- Related Reading
- Frequently Asked Questions
- Final Thoughts
How a Curbless Shower Controls Water
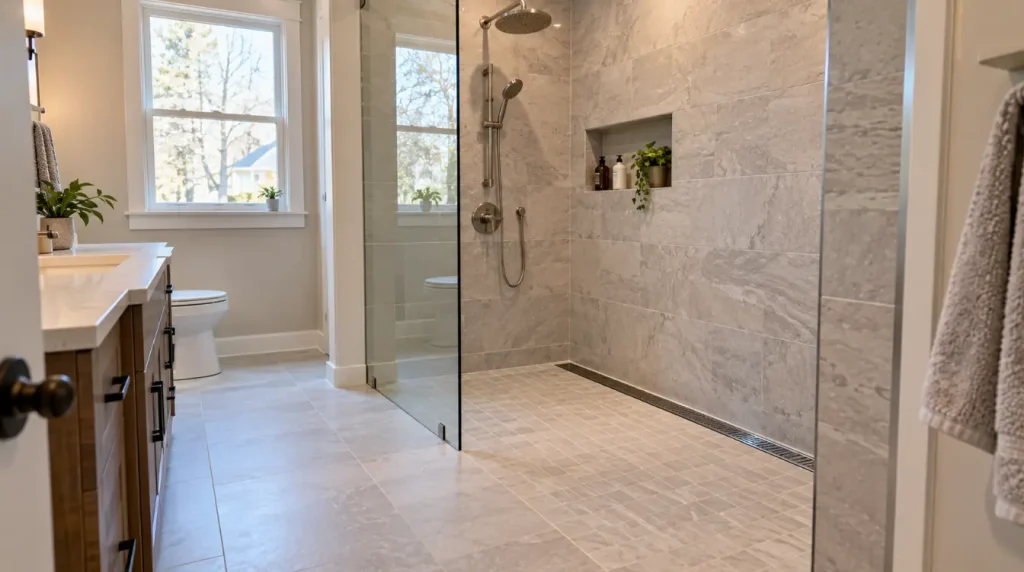
A curbless shower is designed without a raised entrance barrier. Instead of relying on a curb to contain water, the shower assembly uses a sloped floor, a suitable drain, and a waterproofed floor and wall system to direct water into the drainage area.
The role of floor slope
The shower floor must have a continuous slope toward the drain. A commonly used planning reference is approximately 1/4 inch of fall per foot, although the correct slope depends on the drainage system, tile installation, manufacturer instructions, and applicable local requirements.
The important point is not simply having a sloped floor. The finished surface must direct water toward the drain without creating low spots, reverse slopes, or flat areas where water can remain.
The role of the drain
Curbless showers commonly use either a point drain or a linear drain. A point drain is usually located near the center or another designed collection point and requires the surrounding floor to slope toward it from multiple directions. A linear drain is a long, narrow drain that may be positioned along a wall or at the shower entrance. Its location affects the direction and complexity of the floor slope.
The role of waterproofing
Tile and grout are not the primary waterproofing system. A properly constructed shower requires a compatible waterproofing assembly beneath the finished surface, including suitable connections at the drain, corners, seams, and wall-to-floor transitions.
Because a curbless shower has no raised threshold, the transition between the shower floor and the surrounding bathroom floor deserves particular attention. Depending on the system and design, waterproofing may need to extend beyond the immediate shower footprint.
Common Curbless Shower Problems at a Glance
Not every wet bathroom floor indicates a failed waterproofing system. Some problems involve surface water traveling beyond the shower entrance, while others involve water getting underneath the finished floor. Identifying which condition is occurring helps determine the correct repair.
| Problem | Common Cause | Warning Signs | Possible Solution |
|---|---|---|---|
| Water runs into the bathroom | Insufficient or incorrectly directed floor slope | Water crosses the shower entrance during use | Correct the floor pitch or redesign the shower entrance |
| Water pools near the drain | Low spots, poor tile installation, or incorrect slope | Standing water remains after showering | Evaluate the substrate and correct the affected floor area |
| Drain overflows or backs up | Clogged drain, undersized drainage system, or excessive fixture flow | Water rises around the drain during use | Clean the drain and assess its capacity and plumbing connections |
| Water splashes outside the shower | Incorrect showerhead direction or insufficient glass protection | Wet floor mainly near the entrance or open side | Adjust the showerhead or add a suitable glass panel |
| Water appears beneath or beside the shower | Failed waterproofing or leaking drain connection | Stains, dampness, peeling paint, or damaged ceilings below | Investigate the concealed assembly and repair the source |
| Water collects at the bathroom transition | Poor transition design or insufficient waterproofing extension | Repeated dampness outside the shower footprint | Correct the floor transition and compatible waterproofing details |
1. Incorrect Shower Floor Slope
Incorrect floor slope is one of the most common reasons water escapes from a curbless shower. Since there is no raised threshold, the floor must direct water toward the drain rather than allowing it to travel into the surrounding bathroom.
What causes the problem?
Several installation problems can create poor drainage:
- The shower floor does not have enough downward pitch toward the drain.
- Part of the floor slopes away from the drain.
- The substrate has uneven areas or was not properly prepared before tile installation.
- Large-format tiles were installed without accounting for the slope geometry of a point drain.
- Floor movement or a poorly constructed transition changes the finished drainage surface.
A bathroom floor may appear level to the eye while still having small depressions that collect water. Even a relatively minor flat spot can leave puddles after the shower is turned off.
Why this can happen in older American homes
In a 1930s or 1940s house, the existing floor framing may not have been designed to accommodate a recessed curbless shower. Contractors sometimes need to modify the floor height or create a suitable sloped base without compromising the supporting structure.
In a 1950s home with a concrete slab, the drain location and available floor height may limit how the shower base can be constructed. Simply placing a new tile floor over an unsuitable surface will not correct the drainage geometry.
How to identify the problem
Watch where the water travels during normal shower use. If water consistently crosses the entrance even when the showerhead is directed away from the opening, the floor pitch should be investigated. If water remains in isolated areas after the shower stops, low spots or uneven tile installation may be responsible.
A contractor can evaluate the finished surface with appropriate levels, straightedges, and measurements. If the problem is beneath the tile, portions of the shower floor may need to be opened to inspect the substrate and drainage assembly.
Repair options and costs
If the main issue is splash direction or a very localized surface defect, an adjustment may be sufficient. However, a fundamentally incorrect shower floor slope usually requires correcting the underlying floor assembly rather than simply applying more grout or surface sealant.
Small localized adjustments may cost several hundred dollars, depending on access and materials. Rebuilding a shower floor to correct its slope can cost approximately $2,000–$6,000 or more, with full shower reconstruction potentially costing substantially more.
Professional recommendation: Before approving a complete rebuild, ask the contractor to establish whether the problem is limited to the finished surface or extends into the shower pan and waterproofing system.
2. Poor Drain Placement or Insufficient Drainage Capacity
A curbless shower can still allow water to escape even when the floor has some slope. The drain must be positioned correctly and capable of handling the amount of water supplied by the shower fixtures.
Point drains versus linear drains
A point drain collects water from multiple directions. Its location must work with the surrounding floor slope, and the tile layout must accommodate the changing angles. This can be more difficult with large-format tiles.
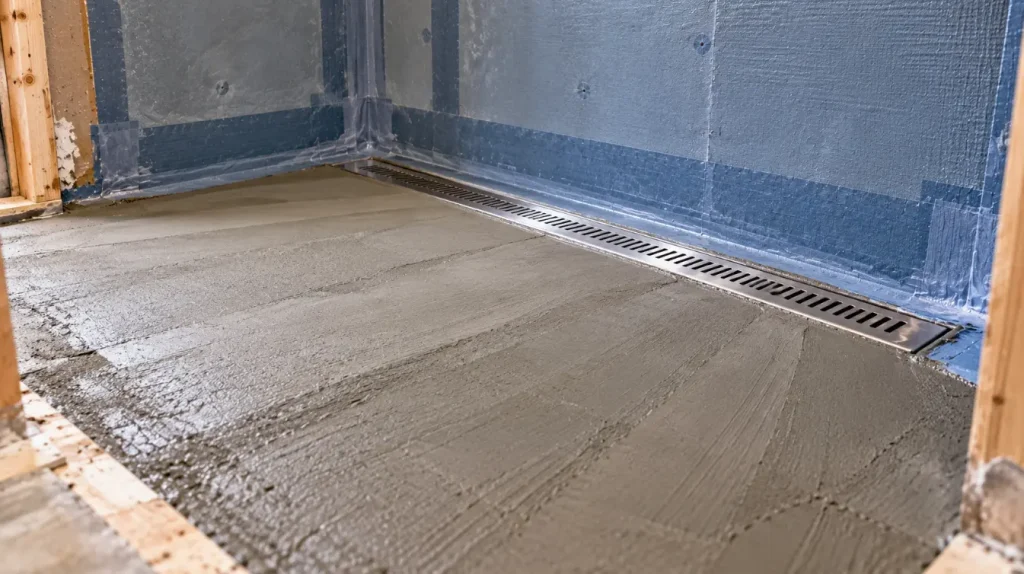
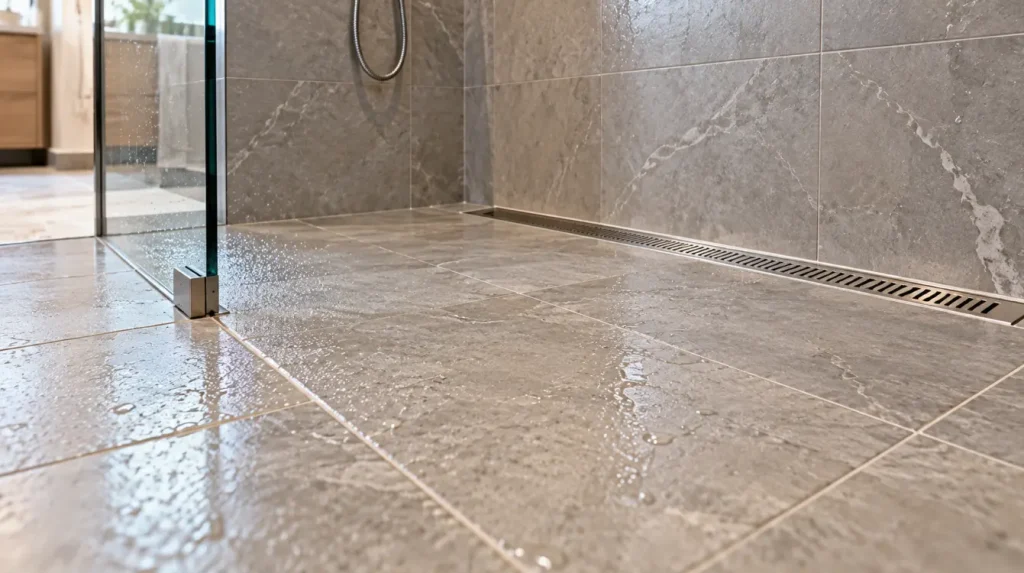
A linear drain can make a curbless design easier to coordinate because the floor may slope in a single direction toward the drain. However, it does not automatically solve drainage problems. The drain must be correctly sized, positioned, connected, and installed with a compatible waterproofing system.
Common drain-related problems
- Hair, soap residue, and debris restrict drainage.
- The drain is poorly positioned relative to the shower entrance.
- The drain assembly is not properly connected to the waterproofing system.
- Multiple shower outlets produce more water than the drain system can handle.
- The downstream drain piping has a blockage or another plumbing defect.
For example, a large rain showerhead combined with body sprays may supply substantially more water than a basic shower arrangement. The drain’s rated capacity and the plumbing system must be evaluated against the expected fixture flow.
How to diagnose and fix drainage problems
First, remove visible hair and debris from the drain cover and check whether normal water flow improves. Avoid using aggressive chemical drain cleaners unless the plumbing and product instructions specifically allow them.
If water still backs up, a plumber may inspect the drain trap, branch line, and accessible piping. A drain camera inspection may be appropriate when a concealed blockage or damaged pipe is suspected.
A simple drain cleaning may cost approximately $100–$300 or more, depending on access and blockage severity. Repairing or replacing a poorly installed drain assembly may cost considerably more because the tile and waterproofing may need to be removed.
Repair or replace? Clean or repair the plumbing when the drain itself is serviceable. If the drain location, capacity, or waterproofing connection is fundamentally unsuitable, modifying or replacing the assembly may be a better long-term solution.
3. Water Splashing Outside the Shower Area
Sometimes the shower is technically draining correctly, but water still reaches the bathroom floor. This is often a splash-control problem rather than a drainage failure.
Why water travels beyond the entrance
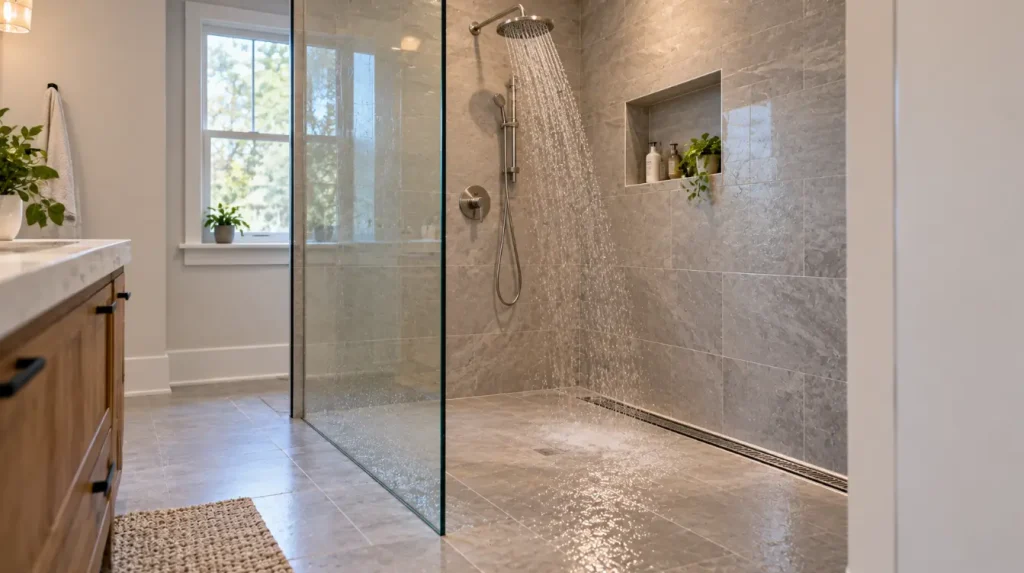
Curbless showers frequently use open entrances or partial glass panels. Without a full enclosure, water can escape through the opening if the showerhead sprays toward it or the shower area is too small for the chosen fixture configuration.
The direction of the spray matters. A handheld showerhead, overhead rain shower, or high-pressure showerhead can send water farther than expected. The position of the controls and showerhead can also make it difficult to keep the spray directed toward the drain.
How to prevent splashing
- Position the showerhead so the main water stream is directed away from the entrance.
- Choose a glass panel long enough to provide useful splash protection.
- Consider a hinged or sliding enclosure when an open layout does not contain water adequately.
- Evaluate the size and shape of the shower area before selecting a large rain showerhead.
- Check whether the shower controls can be reached without standing directly in the water stream.
A fixed glass panel can help contain splashing without creating a fully enclosed shower. However, its effectiveness depends on panel length, opening width, showerhead direction, and the overall room layout.
Adding a glass panel may cost approximately $500–$1,800 or more, depending on dimensions, glass thickness, hardware, and installation conditions. A custom enclosure can cost more.
Professional recommendation: If water only escapes during shower use and there are no signs of concealed moisture, start by evaluating spray direction and glass protection before paying for structural floor reconstruction.
4. Inadequate Waterproofing
Water escaping across the visible tile surface is not the same problem as water entering the floor assembly. The second situation can be much more serious because moisture may damage the subfloor, framing, ceiling, and adjacent rooms.
Why curbless showers need careful waterproofing
A traditional shower curb helps restrict surface water, but it does not replace the waterproofing system beneath the shower. In a curbless shower, the entrance transition has even less tolerance for poor construction because the shower and bathroom floors meet without a raised barrier.
Problems can develop when the membrane is missing, seams are poorly connected, the drain flange is incompatible with the waterproofing system, or wall-to-floor transitions are incomplete.
Other warning signs include:
- Water stains appearing on the ceiling below an upstairs bathroom.
- Swollen baseboards or flooring outside the shower.
- A recurring musty smell near the shower entrance.
- Loose tiles or grout deterioration accompanied by other signs of moisture.
- Soft flooring or visible damage in an adjacent room.
Grout cracks alone do not prove that water has entered the floor assembly. Contractors should evaluate the complete installation and look for evidence of moisture rather than assuming that every cracked grout joint means the entire shower must be replaced.
Inspection and repair options
During construction, a suitable waterproofing inspection and required water testing should take place before tile covers the assembly. Follow the waterproofing manufacturer’s testing procedures and the requirements applicable to the project.
For a finished shower with suspected concealed leakage, a professional may inspect the drain, transitions, nearby walls, and the room below. Moisture measurements and carefully controlled testing may help narrow down the source. Opening a small area may be necessary when the problem cannot otherwise be identified.
If a localized plumbing connection is leaking, repairing the connection may solve the problem. If the membrane or shower pan has failed, a larger reconstruction may be necessary. Simply applying waterproof coating over finished tile is not a reliable substitute for correcting a defective concealed assembly.
5. Floor Height and Structural Problems in Older Homes
Installing a curbless shower in an older American home may require more planning than replacing a conventional shower. The finished shower floor often needs to align closely with the surrounding bathroom floor, while still providing the required slope and sufficient space for the drain assembly.
Wood-framed floors in 1930s and 1940s homes
Many older homes use wood floor joists and subflooring. Creating a recessed shower area may involve modifying the floor assembly, using an appropriate dropped section, or selecting a system designed to fit the available depth.
Cutting or notching structural joists without an engineered or code-compliant plan can weaken the floor. If the existing framing cannot accommodate the proposed design, the shower layout or system may need to change.
Concrete slabs in 1950s and newer homes
Some homes built in the 1950s through the 1980s have concrete slab foundations. Relocating a shower drain or recessing the shower area may require concrete cutting, plumbing modifications, and careful consideration of the slab and existing utilities.
In parts of the Southwest and other regions where slab-on-grade construction is common, these changes can be particularly important during bathroom planning. The cost depends on drain depth, slab conditions, plumbing access, and the amount of concrete work required.
Basements and crawl spaces
When the bathroom is above an unfinished basement or crawl space, contractors may have better access to inspect the underside of the floor and some plumbing connections. However, the framing still needs to be assessed before modifications are made.
If the floor is above a finished basement, moisture escaping through the shower may damage the ceiling or wall finishes below. Repeated water stains should be investigated rather than treated as ordinary paint deterioration.
Professional recommendation: Before choosing a curbless shower system for an older house, ask the contractor to verify framing depth, drain location, finished floor heights, and the compatibility of the proposed waterproofing system. If structural modifications are involved, obtain the appropriate professional assessment before cutting or altering the framing.
How to Identify Why Water Is Escaping
Before choosing a repair, determine whether the water is escaping because of surface drainage, shower spray, a blocked drain, or a concealed leak. These problems can look similar but require different solutions.
Step 1: Observe where the water travels
During normal shower use, observe whether water crosses the entrance, collects beside the drain, or spreads near the glass panel. Do not deliberately flood the bathroom to reproduce the problem. A small amount of water outside an open shower may be splash, while repeated streams or standing water suggest a design or drainage issue.
Step 2: Check the floor after showering
After the shower is turned off, look for persistent puddles. Water that remains in one location may indicate a low spot or uneven floor. Water that travels away from the drain may indicate an incorrect slope or transition. A drain that empties slowly should also be checked for hair, debris, or a plumbing restriction.
Step 3: Inspect nearby rooms and accessible areas
Check baseboards, adjacent flooring, walls, and the ceiling below the bathroom. In a house with an unfinished basement or crawl space, accessible plumbing and the underside of the floor may help reveal a leak. Avoid assuming that a ceiling stain is coming from the shower without checking nearby supply and drain connections.
Step 4: Have the shower assembly evaluated
A qualified contractor can measure the floor pitch, evaluate drain placement, inspect the glass enclosure, and review the waterproofing details. When concealed leakage is suspected, a plumber or water-damage professional may need to perform additional testing.
Ask for the findings to be separated into three categories:
- Surface drainage: Water is crossing the shower entrance or collecting on the tile.
- Plumbing drainage: The drain, trap, or connecting piping is restricted or incorrectly configured.
- Waterproofing: Moisture is entering the concealed floor or wall assembly.
This distinction helps avoid paying for a complete shower replacement when a smaller adjustment may solve the actual problem.
Curbless Shower Repair Costs
The cost of fixing a curbless shower depends on whether the problem is limited to water splashing outside the enclosure or involves the floor slope, drain assembly, or concealed waterproofing. Repairs that require removing tile and rebuilding the shower floor are usually much more expensive than adjustments to the showerhead or glass panel.
| Repair or Improvement | Illustrative U.S. Budget Range | When It May Be Appropriate |
|---|---|---|
| Basic drain cleaning | $100–$300+ | Hair, soap buildup, or a minor accessible blockage |
| Showerhead adjustment or replacement | $100–$400+ | Water spray is directed toward the open entrance |
| Additional fixed glass panel | $500–$1,800+ | Surface splashing occurs around an open shower entrance |
| Localized tile or surface repair | $300–$1,500+ | Limited finish damage with an otherwise sound underlying assembly |
| Drain assembly or shower floor correction | $2,000–$6,000+ | Incorrect drain installation, slope, or localized shower floor reconstruction |
| Major shower reconstruction | $5,000–$12,000+ | Failed waterproofing, widespread damage, or extensive floor and drain modifications |
Important cost limitation: These are broad illustrative planning ranges, not verified 2026 local contractor quotes or guaranteed national averages. Custom glass, demolition, tile selection, regional labor rates, slab cutting, structural modifications, and hidden damage can push costs considerably higher.
When is repair enough?
Repair is generally more practical when the waterproofing system is sound and the problem involves a removable drain obstruction, showerhead position, or insufficient splash protection. A glass panel or a better showerhead arrangement can often address these issues without removing the shower floor.
When should the shower be rebuilt?
Replacement or substantial reconstruction deserves consideration when the floor slope is fundamentally incorrect, the drain assembly is incompatible with the waterproofing system, or water has repeatedly damaged the concealed substrate. If structural floor modifications are needed, the design should be reviewed before the new shower is installed.
Do not accept a proposal to cover an active leak with additional grout, surface coating, or decorative trim. The cause must be identified before deciding how much of the shower needs to be removed.
Common Homeowner Situations
Scenario 1: A curbless shower in a 1940s house leaks toward the hallway
A homeowner with a second-floor bathroom notices water crossing the shower entrance and dampness developing near the hallway flooring. In this situation, the first step is to determine whether the water is running across the finished floor or entering the building assembly.
A contractor should check the floor slope, shower entrance, drain position, and waterproofing transition. If water simply escapes during shower use, the problem may involve the shower layout or insufficient splash protection. If the hallway flooring is becoming damp underneath, the concealed assembly should also be investigated.
Because a 1940s home may have wood-framed floors, any proposed correction involving recessed framing should be reviewed carefully. Cutting joists to create a lower shower floor is not an appropriate do-it-yourself shortcut.
Scenario 2: A 1950s home has a concrete slab and a poorly draining shower
A homeowner installs a modern curbless shower in a slab-on-grade house but notices standing water near the entrance. The drain may be poorly positioned, the shower floor may have insufficient slope, or the concrete preparation may not have created the required floor geometry.
Have the contractor measure the finished floor and assess the drain assembly before deciding on a repair. If the shower floor needs reconstruction, investigate the location of existing plumbing and the scope of any concrete work before approving a new design.
Scenario 3: Water appears on the basement ceiling below the shower
If a basement ceiling develops recurring stains after a bathroom remodel, do not assume the problem is caused by water escaping across the shower entrance. A failed drain connection, leaking supply fitting, or waterproofing defect may be allowing water into the floor assembly.
A plumber can examine accessible piping and connections, while a qualified water-damage professional can assess affected building materials if needed. Repair the source first and make sure affected materials are appropriately dried before restoring the ceiling.
Which solution is best for different homeowners?
- Best for budget-conscious homeowners: Begin with drain cleaning, showerhead direction, and glass splash protection when the waterproofing and floor assembly are confirmed to be sound.
- Best for long-term homeowners: Correct inadequate slope, unreliable drainage, and waterproofing defects rather than relying on repeated cosmetic repairs.
- Best before selling: Investigate recurring leaks, document completed repairs, and correct functional problems rather than hiding water damage with new finishes.
- Best for rental properties: Prioritize reliable drainage, durable finishes, accessible drain maintenance, and a practical glass enclosure that reduces water escaping into the bathroom.
How to Prevent Curbless Shower Problems
A curbless shower is easiest to construct correctly when drainage, floor height, waterproofing, and glass placement are coordinated before demolition. Waiting until the tile is installed to address these details can turn a manageable design issue into an expensive reconstruction project.
1. Choose the drainage layout before construction
Decide whether a point drain or linear drain is appropriate for the room. Confirm the location, outlet connection, required floor pitch, and expected shower flow before finalizing the tile layout. The drain should be compatible with the waterproofing system and approved for its intended installation.
2. Evaluate the existing floor structure
In older houses, check the available floor depth, joist direction, subfloor condition, and drain routing. On concrete slabs, establish whether the drain can be installed at the required elevation without creating other problems. Structural components should never be altered without appropriate assessment.
3. Use a complete waterproofing system
Follow one compatible waterproofing system and its installation instructions. Pay special attention to the drain connection, inside and outside corners, wall-to-floor transitions, and shower entrance. Complete required inspections and testing before the finished tile conceals the work.
4. Match the glass enclosure to the shower layout
Consider the size of the shower, position of the showerhead, and direction of the water spray. A partial glass panel may be sufficient for some layouts, while other bathrooms need a more enclosed design. Do not assume that every open shower will contain water equally well.
5. Test the finished shower before relying on it
After installation, verify that water moves toward the drain under normal operating conditions and that the drain handles the expected fixture flow. Check the shower entrance, nearby flooring, and adjoining areas for unwanted water. Follow the installer’s and manufacturer’s instructions for any final testing rather than performing an uncontrolled flood test.
Related Reading
Curbless shower problems sometimes involve other parts of an older home’s plumbing and moisture-control systems. These related topics can help homeowners investigate the source of recurring water problems and plan repairs more effectively.
- Hidden water leaks behind bathroom walls, under floors, and around older plumbing connections.
- Water damage and moisture problems in older American homes, including basement and crawl space conditions.
- Bathroom remodeling mistakes involving waterproofing, ventilation, floor preparation, and plumbing installation.
- Warning signs of aging drain pipes and plumbing connections in older houses.
Frequently Asked Questions
Why does water come out of my curbless shower?
Water can escape because the floor does not slope correctly toward the drain, the drain is poorly positioned, or the showerhead sprays toward the open entrance. A short glass panel may also provide insufficient splash protection for the shower’s size and layout. Start by observing where the water travels during normal shower use. If it crosses the entrance, examine the slope and enclosure design. If water pools near the drain, investigate the floor surface and drainage system. If nearby flooring, ceilings, or walls become damp, have the concealed waterproofing and plumbing connections inspected rather than assuming the problem is only surface splashing.
How much does it cost to fix a curbless shower that leaks?
The price depends on the source of the problem. Basic drain cleaning may cost around $100–$300 or more, while adding a fixed glass panel may cost approximately $500–$1,800 or more. Correcting a poorly constructed shower floor or drain assembly can cost several thousand dollars, and a full reconstruction may exceed $10,000 in complex projects. These are broad planning figures rather than verified local quotes. Before authorizing work, ask whether the water is escaping across the tile or entering the concealed floor assembly. That distinction can prevent an unnecessarily expensive repair.
Can a curbless shower be fixed without removing all the tiles?
Sometimes. If the cause is a blocked drain, poorly directed shower spray, or insufficient glass protection, the correction may not require removing tile. However, if the finished floor has an incorrect slope, the drain connection is defective, or the waterproofing system has failed, removing part or all of the shower floor may be necessary. Applying additional grout or surface sealant will not correct a fundamentally defective shower assembly. Have the installation assessed before choosing a repair. The goal should be to correct the cause while preserving as much sound construction as practical.
Is a curbless shower a good choice for an older American home?
Yes, provided the floor structure, drain location, and waterproofing details can accommodate the design. A curbless shower can be especially useful for homeowners who want easier entry or are planning for long-term accessibility. However, a 1930s or 1940s wood-framed floor may require more careful structural planning, while a concrete slab may require additional drain or floor preparation. Before choosing the design, ask a qualified contractor to assess available floor depth, framing, plumbing, and finished floor heights. If the existing structure cannot support a reliable installation without extensive modification, a low-threshold shower may be a more practical alternative.
Final Thoughts
Curbless showers do not have a raised barrier to keep water inside, so their performance depends on correct floor slope, drain placement, waterproofing, and splash protection. When any of these components is poorly designed or installed, water can escape onto the bathroom floor or enter the surrounding building materials.
Before choosing a repair, identify whether the problem comes from surface drainage, shower spray, a plumbing restriction, or concealed waterproofing failure. In older American homes, also consider the condition of the subfloor, framing, concrete slab, and accessible plumbing connections.
For a new installation, finalize the drain layout and floor height before construction. For an existing shower, avoid spending money on cosmetic fixes until the actual source of the water has been identified.
